Add a Sign Up Form to Blogger: Collect Emails the Easy Way 2026

Wanna grow your blog and keep visitors coming back?
You need a sign up form—yes, even if you’re just starting out.
In this post, I’ll show you exactly how to add a sign up form to Blogger step-by-step, with no tech headaches.
Even if you don’t know anything about email marketing or code, you’re in the right place.
Let’s keep it simple.
💡 What’s a Sign Up Form?
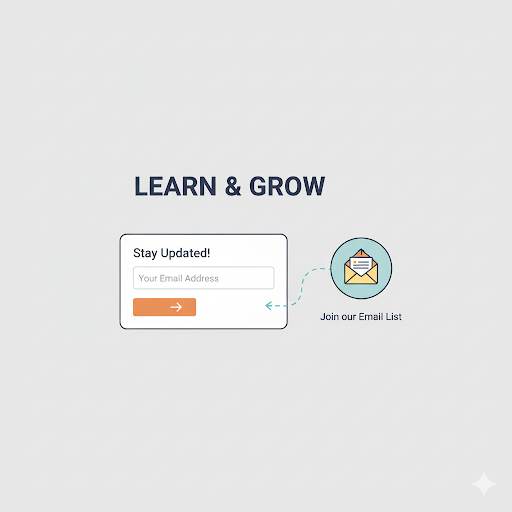
A sign up form is that little box you see on websites that says something like:
“Enter your email to get updates!”
When someone types their email in, they’re added to your list—so you can stay in touch, send tips, new posts, or even offers later.
- This is how real blogs grow.
- One subscriber at a time.
🙋♂️ Why Do You Need One?
Because people visit your blog once… and forget.
A sign up form helps you:
- Build an audience
- Keep readers coming back
- Grow your brand (and maybe income later)
Even if you’re not ready to send emails now, start collecting them.
You’ll be glad you did.
✅ Tools You Can Use (Free & Easy)
You don’t need anything fancy.
These are perfect for beginners:
- Systeme.io – Easy and 100% free
- ConvertKit – Great for simple forms
- Mailchimp – Popular, but slightly advanced
- Google Forms – Basic, free, and works well for starters
💡 Tip: Start with Systeme.io if you want a free tool that just works.
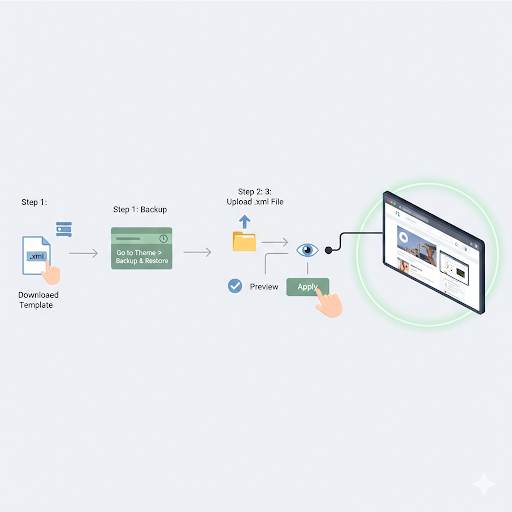
🛠️ How to Add a Sign Up Form to Blogger

Step 1: Create Your Form
Use one of the tools above to make a simple form.
Just ask for the email.
Keep it clean.
Step 2: Copy the Embed Code
Once your form is ready, the tool gives you a code.
Copy it.
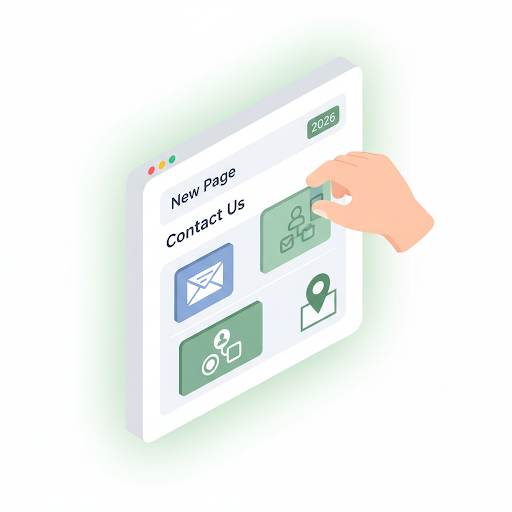
Step 3: Add It to Blogger
- Go to your Blogger dashboard
- Click on Layout
- Pick a spot (sidebar or footer works well)
- Click Add a Gadget > HTML/JavaScript
- Paste the code and save
Done. You just added your first email sign up form.
📍 Best Places to Show Your Form
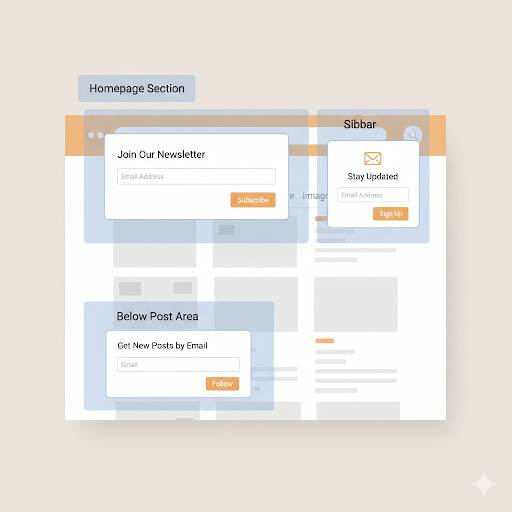
Put it where people will see it:
- At the top or middle of your sidebar
- Under each blog post
- On your homepage
Don’t hide it.
You want people to notice and take action.
✏️ What Should It Say?
Be clear and human. Don’t overthink it.
Try lines like:
- “Join my free email list”
- “Get blog tips straight to your inbox”
- “Subscribe for updates and freebies”
Tell people why it’s worth giving you their email.
Keep it short.
🚫 Common Beginner Mistakes
Here’s what to avoid:
- Asking for too much info (just ask for email!)
- Making the form hard to find
- Using boring or confusing words
- Not testing if the form actually works
One simple form is all you need to start.
📬 What Happens After Someone Signs Up?
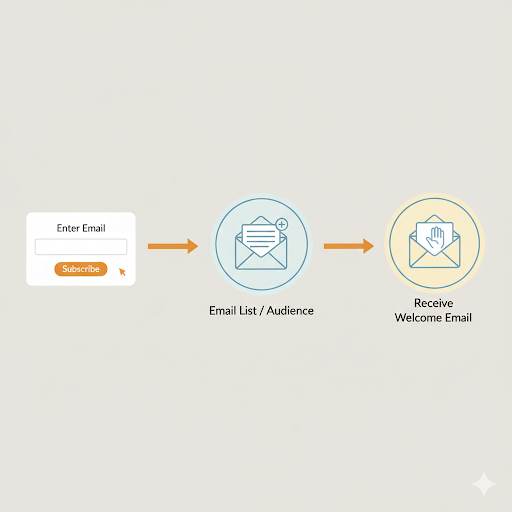
Their email goes to your list.
You can:
- Send them a welcome email
- Share blog updates
- Offer free tips, tools, or downloads
Even if you send emails once a month—it’s still powerful.
Final Tip
Don’t wait until your blog is “big” to care about email.
Start with a simple sign up form to Blogger today.
It’s one of the best things you can do to grow—slowly, steadily, and smartly.
Want more blogging help like this?
Stick around Digital Bulid—we share tips that actually help beginners move forward.