What’s a Custom 404 Page? (And Why Your Blog Needs One)
Ever clicked a link and ended up on a page that says “404 – Page Not Found”?
It’s frustrating, right?
Now imagine someone visiting your blog and getting that same dead-end.
Not a great first impression.
That’s where a custom 404 page comes in.
It’s a simple fix that helps you keep visitors on your blog — even when something goes wrong.
Let me walk you through what it is, why it matters, and how to create one (even if you’re just starting out).
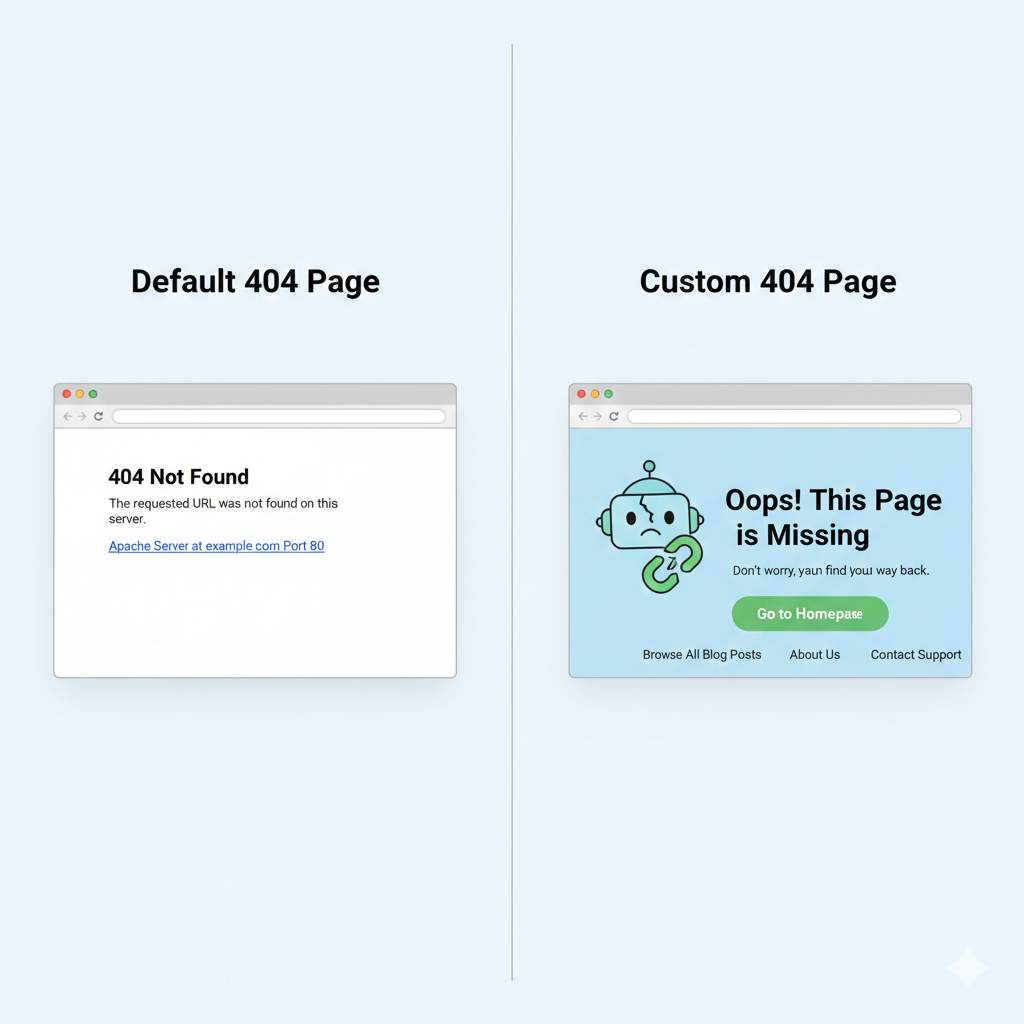
🤔 So, What Is a 404 Page?
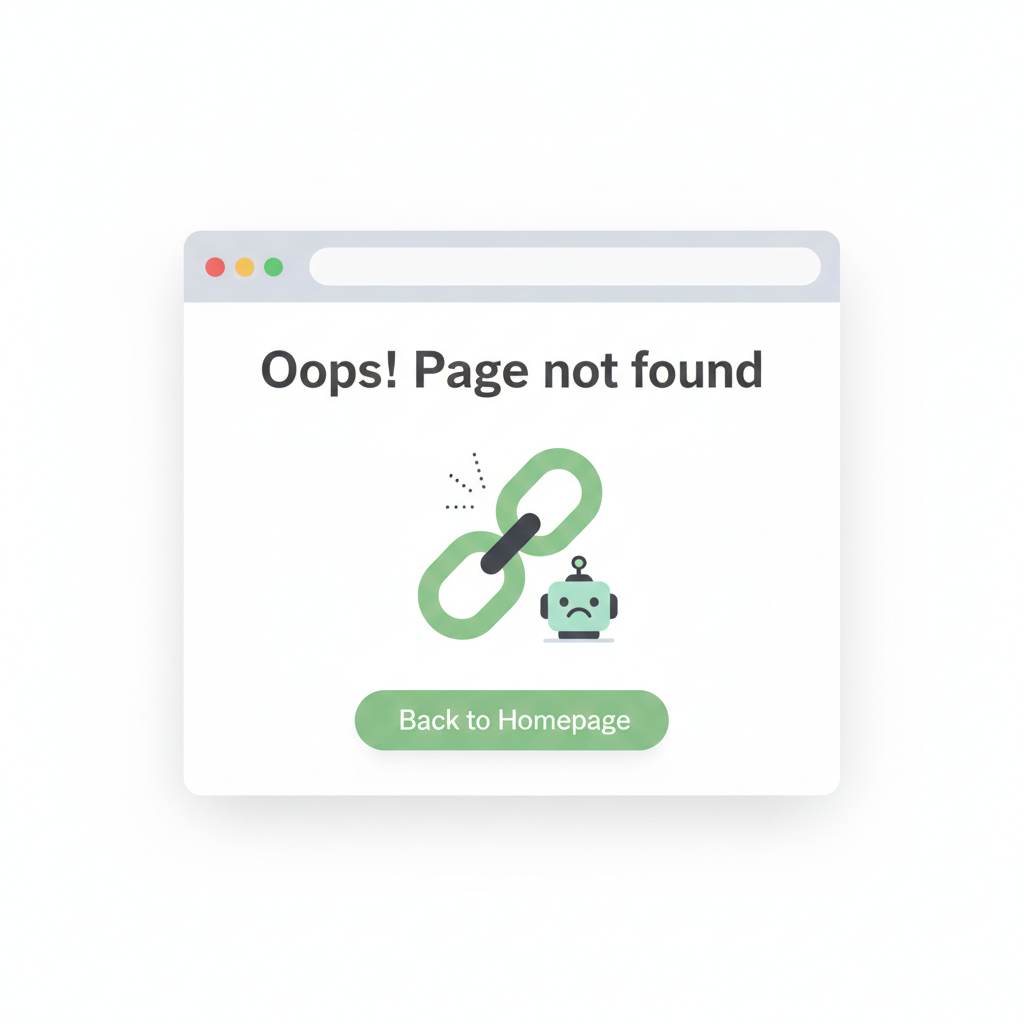
A 404 page is what people see when the page they’re looking for doesn’t exist.
This can happen when:
- You delete a blog post.
- You change a link.
- Someone types the URL wrong.
- Google still shows an old link.
Instead of leaving people confused or annoyed, you can create a custom 404 page that guides them back to the right place.
Think of it like a friendly “Oops, wrong turn!” with a map to help them get back on track.
👀 Why Should You Bother?
Here’s the truth:
- A default 404 page is boring.
- It makes your site feel broken.
A custom one?
- Keeps visitors on your site longer.
- Shows you care about their experience.
- Can even boost your SEO (because people don’t leave right away).
Most new bloggers skip this step — but that’s why doing it makes you stand out.
❌ Some Common Misunderstandings
Let’s clear a few things up:
“404 errors will hurt my site.”
Not true.
- Every website has them.
- What matters is how you handle them.
“I need to delete 404 pages.”
Nope.
You just need to manage them properly.
“I have to know code.”
Definitely not.
Most blogging platforms (like Blogger) let you create one in a few minutes.
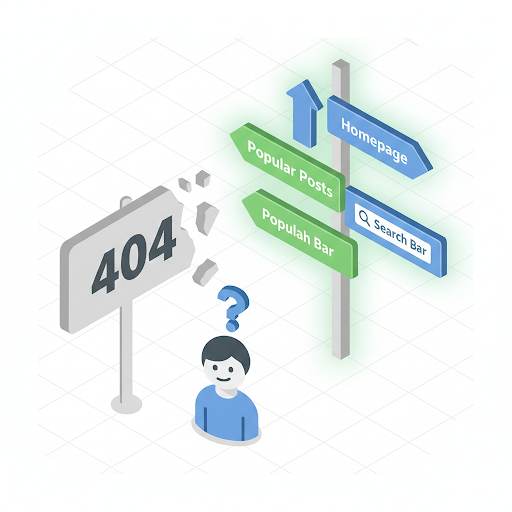
👍 What a Good Custom 404 Page Looks Like
It doesn’t need to be fancy.
Just make sure it:
- Has a simple, friendly message.
- Gives people a way to keep exploring (like a button or link to your homepage).
- Maybe adds a personal touch — a smiley, joke, or short apology works great.
The goal is to say:
“Hey, sorry about that.
Here’s where you can go instead.”
🛠 How to Set It Up on Blogger (It’s Easy)
If you’re using Blogger, here’s how to add your own 404 message:
1. Go to your Blogger dashboard.
2. Click on Settings → scroll to Errors and redirects.
3. Under Custom Page Not Found, write your message.
Example:
“Oops! Looks like this page is gone.
But don’t worry — click here to find something helpful!”
4. Save your changes — that’s it!
You can use plain text or add a little HTML if you’re comfortable.
🙅♂️ Mistakes to Avoid
Just a few things to watch out for:
- Leaving the default page. It’s cold and unhelpful.
- Not adding a link. People need a way back.
- Making it too serious. Keep it light and friendly.
- Forgetting to test it. Try clicking a broken link to make sure it works.
💡 Pro Tip
If you have popular posts, link to them from your 404 page.
This keeps people on your site longer — and they might find something they love.
✨ Final Thoughts
You don’t need to be techy or experienced to set this up.
A custom 404 page is one of those small things that makes a big difference.
- It shows you care.
- It keeps people on your blog.
- And it just feels more professional.
Take 10 minutes today and set yours up — you’ll be glad you did.