How to Customize Blogger Template in 3 Safe Steps (No Breaks)
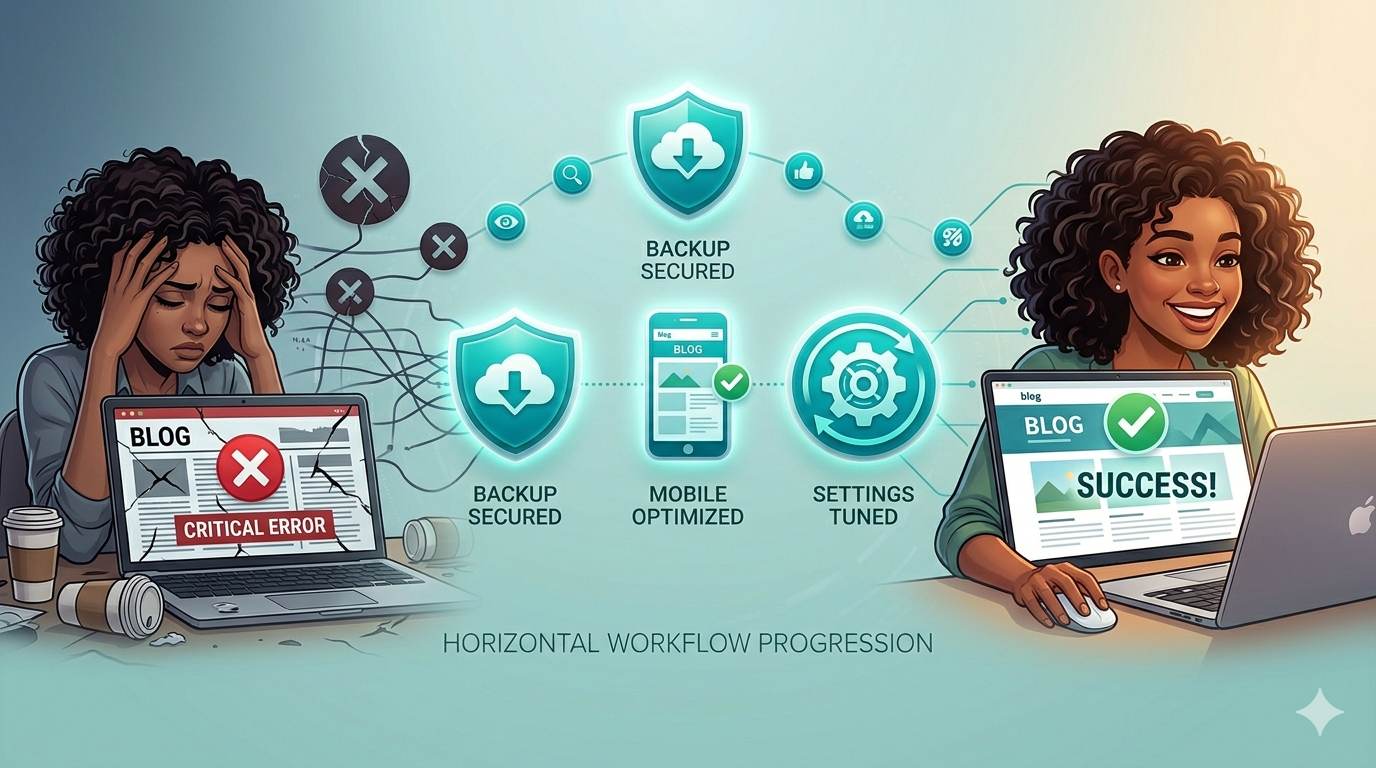
📘 TL;DR – What you’ll learn: Fear of breaking your Blogger template stops most beginners from customizing. This guide solves the real problems – XML errors, mobile disasters, changes that won’t save – in 3 safe steps. Backup first, then fix common issues without stress. Your blog will look professional without the fear.
🔥 The Fear That Keeps Blogs Looking Generic
You want your blog to look professional. You’ve picked a beautiful template. But you’re terrified of breaking something, brother. What if you get the dreaded “Your template could not be parsed” error? What if your blog looks fine on desktop but explodes on mobile? What if your changes just won’t save?
These are real fears. And most blogging guides ignore them. They just say “click customize” and pretend everything works perfectly. But you and I know better. So let’s fix that. In this guide, I’ll show you how to customize your Blogger template without breaking your blog – in 3 safe steps that solve the actual problems that break blogs.
Before you start customizing, make sure you have a template worth working with. My guide on Best Free Blogger Templates shows you where to find clean, responsive designs. And if you haven’t installed one yet, read How to Change Blogger Template first – it takes 5 minutes.
📌 True story – Ahmed
Ahmed downloaded a free template, installed it without backup, and his site broke. Buttons didn’t work. Mobile was a mess. He almost quit blogging. Then he found the fixes below – and now he customizes templates without fear. You can too.
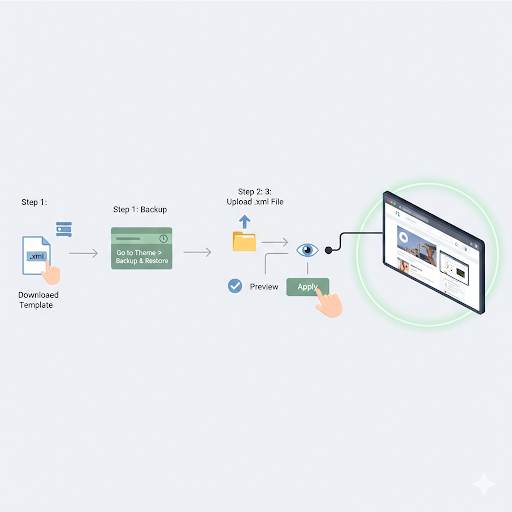
⚠️ Before we start – The Golden Rule (30 seconds): Backup your current template NOW. Go to Blogger Dashboard → Theme → click the three dots → Backup. Save the .xml file to your computer. If anything goes wrong, you restore it. This one step removes 100% of the fear.
✅ The 3 Safe Steps to Customize Your Blogger Template (Without Breaking Anything)
Step 1: Fix Mobile Display (The #1 Problem)
The problem: You install a beautiful responsive template, but on your phone it looks like a disaster – zoomed out, broken layout, unreadable text.
The fix (takes 30 seconds): Blogger has a separate mobile theme setting that overrides your new template. Here’s how to turn it off:
- Go to Blogger Dashboard → Theme
- Click the gear icon or dropdown arrow next to the Customize button
- Select “No. Show desktop theme on mobile devices”
- Save. Your responsive template will now work correctly on phones.
👉 Pro tip: After saving, open your blog on your actual phone and test. Pinch, zoom, scroll. If it looks good, you’re done with Step 1.
Step 2: Fix XML & Installation Errors (The Scary One)
The problem: You try to upload a template and Blogger rejects it with “Your template could not be parsed as it is not well-formed” – or the template installs but your sidebar disappears.
The fix (takes 2 minutes):
- Fix A (easiest): Redownload the template file from the source – it might be corrupted. Use only trusted sites like Gooyaabi, BTemplates, or Templateism.
- Fix B (install without gadgets): Go to Blogger Dashboard → Theme → Edit HTML. Delete everything. Paste the new template’s raw XML code. Click Save. The template will install without any widgets. Then add your gadgets one by one from the Layout menu.
- Fix C (advanced): Open the .xml file in Notepad. Search for unclosed tags like
<img>or<br>– in XML, they must be<img />or<br />.
🔥 The safest method: Always test new templates on a test blog first (create a new blog with a dummy name like “my-test-blog”). If it works there, install it on your real blog. This one habit will save you hours of frustration.
Step 3: Customize Without Breaking (Theme Designer vs HTML)
The problem: You change fonts, colors, hit save – but nothing changes, or it goes back to default. Or worse, you edit HTML and break the entire layout.
The fix (the safe order):
- First, use Theme Designer (no code needed). Go to Theme → Customize. Here you can safely change: fonts, colors, layout width, background images.
- Second, only touch HTML when you’re ready. And always backup before any code edit.
- If changes don’t save: Clear your browser cache (Ctrl+Shift+Del), try a different browser, or disable AdBlock temporarily.
📋 The 5 Real Problems That Break Blogger Templates (And How to Fix Them Fast)
❌ Problem 1: “Your template could not be parsed” (XML error)
✅ Fix: Redownload the template from a trusted source. Or open the .xml file and look for unclosed tags like <img> (should be <img />).
❌ Problem 2: Mobile view is broken (desktop looks fine)
✅ Fix: Blogger Dashboard → Theme → gear icon → “No. Show desktop theme on mobile devices”. Save.
❌ Problem 3: Template installs but sidebar/gadgets disappear
✅ Fix: Install without gadgets first: Theme → Edit HTML → delete everything → paste new XML → Save. Then add gadgets one by one.
❌ Problem 4: Changes in Theme Designer don’t save
✅ Fix: Clear browser cache, try a different browser, or disable AdBlock. Also check for HTML errors.
❌ Problem 5: You broke something in HTML and don’t know how to fix it
✅ Fix: Restore your backup (that’s why you backed up first!). Then stick to Theme Designer until you’re comfortable.
📍 Where to Find Safe, High-Quality Free Templates (No Viruses, No Hidden Links)
Always download from trusted sources. Here are the most reliable places I’ve personally used:
- Gooyaabi Templates – clean, modern, tested
- BTemplates – hundreds of free, user-rated designs
- Templateism – professional and responsive
- Blogger’s official library (built-in) – safest but limited
⚠️ Warning: Avoid random sites that ask you to “disable ad blocker” or download suspicious files. One bad file can break your blog or add hidden spam links. Stick to the list above.
💡 The Brutal Truth (Read This Twice)
Most beginner bloggers never customize their templates because they’re afraid of breaking something. That fear keeps their blogs looking generic and unprofessional. And that fear is unnecessary.
Here’s the reality: You will make mistakes. You will install a template that looks weird on mobile. You will accidentally remove a widget. That’s fine. That’s how you learn. The only real mistake is not backing up before you start. With a backup, you can always go back. Without a backup, you’re one click away from disaster.
So backup now. Then stop being scared. Your blog deserves to look as good as your content. Once your design is set, focus on creating content people love – my Visual Content for Bloggers guide shows you how to make your posts visually irresistible.
📅 Your 7‑Day Safe Customization Plan (Follow This Exactly)
- Day 1: Backup your current template (30 seconds – do it now).
- Day 2: Create a test blog – name it “My Test Blog” (takes 2 minutes).
- Day 3: Find a free template from a trusted source (BTemplates or Gooyaabi) – download the .xml file.
- Day 4: Install the template on your test blog. Test desktop, mobile (Step 1 fix), and gadgets.
- Day 5: Customize fonts and colors using Theme Designer on the test blog (Step 3).
- Day 6: If everything works, install the same template on your real blog using Restore.
- Day 7: Add your logo, clean up sidebar, and publish with confidence.
After 7 days, you’ll have a professional, unique blog – and zero fear of breaking anything.
🙋 Frequently Asked Questions
Why does my template look different on mobile than on desktop?
Blogger has a separate mobile theme setting. Go to Theme → gear icon → select “No. Show desktop theme on mobile devices” – then save.
What does “Your template could not be parsed” mean?
It means your XML file has an error – usually an unclosed tag. Redownload from a trusted source, or open the file and check for <img> without a closing slash.
How do I restore my backup if I break something?
Go to Theme → down arrow → Restore → Upload your saved .xml file. Your old template will be back instantly.
Can I customize fonts and colors without touching HTML?
Yes. Use Theme Designer (Theme → Customize). You can change fonts, colors, background images, and layout width – no code needed.
Why should I use a test blog?
A test blog lets you experiment without risking your live site. Create one for free – it takes 2 minutes. Test all changes there first, then apply to your real blog.
🎤 Final Thoughts: Stop Being Scared, Start Customizing
You now know how to customize your Blogger template in 3 safe steps – without breaking anything, without fear, and without wasting hours on Google searches for error messages.
Stop being scared. Open your Blogger dashboard. Backup your template (30 seconds). Then follow the 3 steps above. Your blog deserves to look as good as your content. Your readers will notice. And you’ll wonder why you waited so long.
You’ve got this, brother. 👻
👉 Ready to stop being scared and start customizing? Go to your Blogger dashboard now. Backup your template first. Then follow the 3 steps. You’ll be done in 10 minutes.